by Hamiltonaircon | Sep 17, 2025 | Household
An air conditioning system is designed to create comfort by regulating indoor temperature and improving air quality. Yet, like any piece of equipment, it is susceptible to faults. One of the most common and often overlooked issues is water leakage. At first, it may appear as nothing more than a minor inconvenience. However, left unchecked, water leaks can lead to damage within the system, unnecessary repair costs, and even harm to your property. Understanding how to identify and resolve water leak problems in your AC system is vital for maintaining efficiency and ensuring long-term reliability.
Understanding Why AC Systems Leak Water
To appreciate why water leaks occur, it is helpful to understand how an AC system operates. When air passes over the evaporator coils, humidity in the air condenses into water. This is normal and is channelled away through the condensate drain into a pan and out of the unit. Problems arise when water does not flow as intended. A blocked drain, faulty installation, or damaged parts can cause this condensed water to overflow, leading to visible leaks.
While some condensation is perfectly normal, a consistent puddle near your indoor unit or damp stains on nearby walls are strong indicators of an underlying problem. Prompt attention is essential to prevent further damage.
Common Signs of Water Leak Issues
Spotting a water leak at an early stage helps reduce the risk of more extensive damage. Some signs to look for include:
- Visible water pooling around the base of the unit or beneath ceiling vents.
- Damp patches on walls, flooring, or ceilings near the system.
- Unusual dripping sounds when the unit is running.
- Decreased cooling performance as the system struggles to function properly.
Any of these signs suggest the system is not working as intended and requires closer inspection.
Causes of Water Leaks in AC Systems
Blocked Condensate Drain Line
The condensate drain line channels water out of the unit. Over time, it can become clogged with dust, dirt, and algae growth. Once blocked, water backs up into the system, resulting in leakage.
Damaged or Rusted Drain Pan
The drain pan is designed to catch condensation before it drains away. When the pan is cracked, rusted, or misaligned, it cannot contain water effectively, which causes spills.
Frozen Evaporator Coils
Restricted airflow, dirty filters, or low refrigerant can cause coils to freeze. When they thaw, large amounts of water may leak around the unit.
Poor Installation or Low Refrigerant Levels
Improper installation may leave the unit at the wrong angle, preventing water from draining. Low refrigerant can reduce pressure and airflow, resulting in coil freezing and subsequent leaks.
Dirty Air Filters
Filters clogged with dirt and dust restrict airflow. This not only strains the system but also contributes to ice formation on coils, which melts into excess water.

How to Spot AC Water Leaks Early
Prevention is always better than cure. Monitoring your system regularly helps detect issues before they become serious.
- Inspect the area around the indoor unit at least once a week.
- Check for signs of moisture, mould, or mildew.
- Listen for irregular dripping noises.
- Keep an eye on cooling efficiency; reduced performance is often a red flag.
If you notice any of these signs, address the issue quickly rather than waiting until the problem escalates.
Steps to Resolve Water Leak Problems
Cleaning the Condensate Drain Line
The most common cause of leaks is a clogged drain. Professional engineers often use specialised equipment to flush out blockages, ensuring smooth water flow.
Replacing a Damaged Drain Pan
If the pan is rusted or cracked, replacement is the only long-term solution. A well-fitted new pan prevents further leaks and protects surrounding surfaces.
Addressing Frozen Coils
When coils freeze, the solution involves removing the root cause. This can include replacing air filters, inspecting refrigerant levels, and restoring adequate airflow.
Professional Servicing and Preventive Maintenance
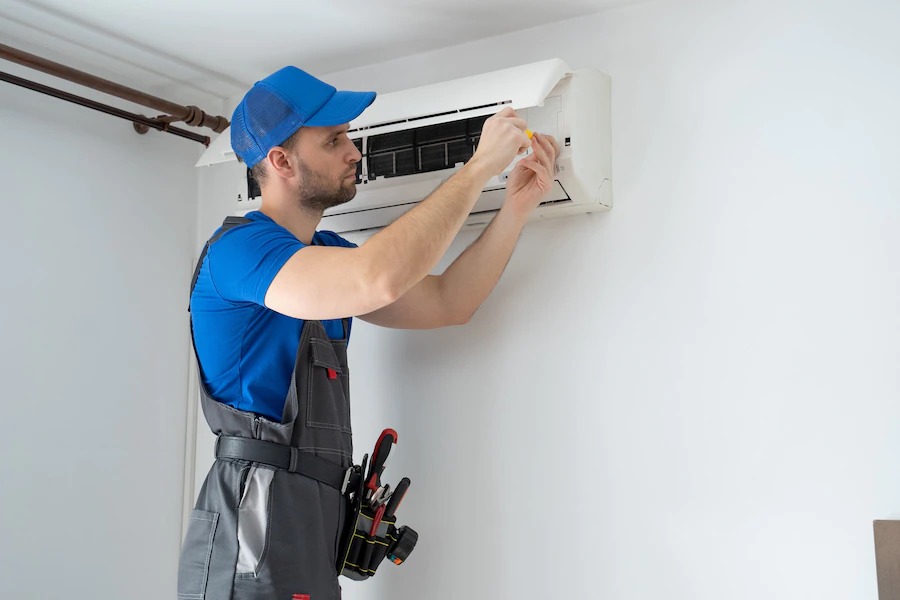
An air conditioning company london can carry out a complete inspection, addressing not only the leak but also any underlying causes. Preventive servicing also helps extend the system’s lifespan.
Preventive Measures for the Future
Once your AC system is back in good order, regular maintenance helps prevent a recurrence of water leaks. Some practical measures include:
- Cleaning or replacing air filters every one to two months.
- Scheduling annual servicing with qualified professionals.
- Ensuring that the outdoor unit remains free of debris and dust.
- Monitoring performance and acting quickly if you notice unusual changes.
Prevention not only saves time and money but also ensures you enjoy uninterrupted comfort during warmer months.
When to Call for Professional AC Repair
While some homeowners attempt basic maintenance themselves, it is often safer and more effective to rely on trained technicians. DIY attempts can cause more harm than good, especially when dealing with refrigerant or electrical components. Contacting air conditioning repair london specialists ensures that issues are handled correctly and safely. A professional will not only fix the immediate leak but also assess the system for potential weaknesses.
Conclusion
Water leaks in an AC system are not only inconvenient but can lead to costly repairs if ignored. Recognising the early signs, understanding the common causes, and taking the right steps to resolve them ensures your system remains efficient and reliable. Regular servicing, routine inspection, and professional repair are the best ways to protect your investment.
For those seeking reliable expertise, Hamilton Air Conditioning Ltd provides trusted services that help maintain performance, prevent leaks, and extend the life of your system. With professional care, you can ensure that your air conditioning operates at its best all year round.

by Hamiltonaircon | Apr 29, 2025 | Online Services
When your air conditioning system starts showing signs of distress, it can be tempting to call in the professionals right away. However, before you do, consider the possibility of fixing the issue yourself. DIY air conditioning repairs can save you money, and often, the problems are simple enough to handle without the need for a technician. Whether it’s a dirty filter or a clogged drain line, understanding what your air conditioner needs can help you troubleshoot common issues. In this guide, we’ll walk you through easy fixes, essential tools, and crucial safety tips to ensure your AC continues to run smoothly.
Understanding Your Air Conditioning System
Before diving into repairs, it’s essential to understand how your air conditioning system works. Familiarising yourself with the key components can also help if you’re considering a home air conditioning installation. The primary parts include:
- Compressor: This pumps refrigerant through the system, absorbing and releasing heat.
- Evaporator Coils: Found inside the unit, these cool the air that circulates through your space.
- Condenser Coils: Located outside, they expel heat absorbed by the refrigerant.
- Refrigerant: This cooling agent helps move heat from inside your home to the outdoors.
Understanding these components will help you diagnose issues and determine when to attempt a fix yourself or when to call for air conditioning repair.

When to Attempt DIY Repairs
While many air conditioning issues can be fixed at home, it’s important to know when you should take matters into your own hands. Typical problems that you can tackle include:
- Clogged Filters:Clogged filters are among the simplest issues to address, yet they often result in poor airflow and reduced efficiency.
- Frozen Coils: This can occur when airflow is restricted or the refrigerant level is low.
- Water Leaks: These are usually caused by a blocked drain line.
- Noisy Units: These can be a sign of loose parts or dirty coils.
These types of issues are usually manageable with basic tools and a little patience. However, more complex issues like refrigerant leaks or compressor problems often require a professional.
Common Air Conditioning Problems You Can Fix Yourself
1. Low or No Cool Air
If your AC is blowing warm air, it could be due to a clogged filter, dirty condenser, or low refrigerant levels.
Steps to Fix:
- Check the Air Filter: A clogged air filter hampers airflow, leading to decreased cooling efficiency. Replacing or cleaning the filter can quickly resolve this problem and restore optimal performance.
- Clean the Condenser Coils: Dirt or debris in the condenser can prevent the unit from releasing heat properly. Turn off the AC, remove any visible debris, and use a hose to gently clean the coils.
2. Air Conditioner Won’t Turn On
This could be caused by a tripped circuit breaker, blown fuse, or malfunctioning thermostat.
Steps to Fix:
- Check the Circuit Breaker: If the circuit breaker has tripped, reset it by switching it off and then back on.
- Replace the Fuses: Check your fuse box for blown fuses and replace them if necessary.
- Reset the Thermostat: If the thermostat isn’t working correctly, turn it off, wait a few minutes, and turn it back on.
3. Noisy Air Conditioner
Unusual sounds may signal loose parts or dirty components within the system
Steps to Fix:
- Check for Loose Parts: Tighten any loose screws or bolts that may be causing rattling.
- Clean the Coils: Dust and dirt on the coils can create noise. Gently use a soft brush or vacuum to clear away any debris.
4. Water Leaks
If your AC is leaking water, it may be due to a clogged drain line or dirty evaporator coils.
Steps to Fix:
- Clear the Drain Line: Use a wet/dry vacuum to clear the clog in the drain line.
- Clean the Coils: Dirt buildup can cause excess condensation. Clean the coils gently with a soft brush.
5. Frozen Coils
Frozen coils often occur when airflow is restricted or the refrigerant level is low.
Steps to Fix:
- Inspect the Filters: Clean or replace the filter to ensure proper airflow.
- Thaw the Coils: If the coils are frozen, turn off the AC and let them thaw. This could take a few hours.
Step-by-Step Guide for Common DIY Repairs
Fixing a Clogged Drain Line
If you notice water pooling around your AC unit, it might be due to a clogged drain line, which can cause leaks and damage your system.
Steps to Fix:
- Turn Off the AC: Ensure safety by cutting off the power.
- Locate the Drain Line: Usually found near the unit’s base, a plastic pipe leading outside.
- Use a Wet/Dry Vacuum: Attach to the drain line and clear any debris.
- Inspect standing water: Drain any excess from the pan.
- Turn On the AC: Once cleared, power your unit back on.
Replacing Air Filters
Clogged air filters can block airflow, making your AC work harder and reducing its efficiency.
Steps to Replace:
- Turn Off the AC: Safety first!
- Locate the Filter: Typically behind the vent cover or intake.
- Clean or Replace: Wash the filter with soapy water or replace it with a new one.
- Reinstall the Filter: Secure the cleaned or new filter back into its original position.
- Turn On the AC: Your unit should run more efficiently.
Cleaning Coils and Condenser Unit
Dirt buildup on evaporator and condenser coils can reduce cooling efficiency. Regular cleaning helps maintain performance.
Steps to Clean:
- Turn Off the AC: Always switch off the power for safety.
- Clean the Coils: Gently use a soft brush to remove dirt and debris.
- Clear the Condenser Unit: Remove any leaves, dirt, or debris surrounding the outdoor unit to ensure proper airflow.
- Reassemble and Turn On: Once cleaned, reassemble and turn your AC back on.

Safety Tips for DIY Air Conditioning Repairs
While DIY repairs are manageable, it’s important to stay safe. Here are a few tips:
- Turn Off the Power: Always disconnect the power supply before working on your AC to avoid electric shock.
- Wear Protective Gear: Gloves, safety glasses, and sturdy footwear will protect you from sharp edges and debris.
- Be Cautious with Refrigerant: Handling refrigerant is tricky and potentially dangerous. If you think there’s an issue with the refrigerant, it’s safest to contact a professional for assistance..
When to Call the Professionals
Although DIY repairs can be cost-effective, certain problems require the expertise of a trained technician to ensure proper handling. Here are a few instances where you should contact a professional for air conditioning repair London:
- Refrigerant Leaks: Only certified technicians are equipped to handle refrigerants safely.
- Compressor Problems: Compressor issues can be costly and may require a full replacement.
- Electrical Problems: If you’re dealing with complicated electrical issues, it’s safer to call in the experts.
Conclusion
Performing DIY air conditioning repairs is a great way to keep your unit running efficiently and extend its lifespan. By tackling common issues like clogged filters, water leaks, and frozen coils, you can save both time and money. However, always remember that when you encounter more complex problems such as refrigerant leaks or compressor failures it’s best to seek professional help. At Hamilton Air Conditioning Ltd, we specialise in air conditioning repair and installation, ensuring your system stays in peak condition all year round. Keep your AC in top shape with regular maintenance, and enjoy cool, comfortable living without the hassle.